
There are times when I find myself in desperate need of charging my laptop. Perhaps it is because I am working on a project that necessitates constant access to power – or simply because I’m enjoying some downtime and want nothing more than to relax with Netflix! Regardless of the reason behind it, there is always that one annoying experience where I can’t locate my charger; luckily for me, not all chargers are created equal – which makes things easier!
Today, let us take a peek at how to rectify this issue and prevent it from occurring ever again!
What is a loose charging port?
If you neglect to insert your charging cord into a device’s port securely, it might not charge properly.
If you’re still encountering charging issues with your laptop after attempting these remedies, there may be an issue with its charging port. Additionally, if the cable is merely loose; this could also result in USB incompatibility or even damage to both devices! To verify this is indeed the case, follow these steps:
Gently pull up on the cord and inspect its connection along its length. If there are any frayed ends of the wire – now would be an opportune time for a full-on revamp! For example: carefully snip off any broken wires or attempt to fix them with tape. Don’t forget to fully secure the end before plugging it back in to avoid future issues!
What to do if your charging port is loose:
1. Call Apple
If your charging port is loose, it may be an indication of poor workmanship on behalf of Apple. This can be rectified by contacting the nearest Apple Store – they will be able to look into the issue.
If you must charge while other issues persist with your laptop, consider investing in a multi-device USB adapter. These are readily available at most retailers and offer a convenient way to keep multiple devices charged up simultaneously!
2. DIY repair
If nothing can be done to rectify your charging port woes, why not take matters into their own hands? Rather than seeking assistance from a specialist, it is feasible to craft a viable solution that will effectively fix any issue with the space.
Removing the bottom of your laptop and then replacing it with an adaptable enclosure could provide you with up to 180W of power output – a noteworthy upgrade from the original design!
3. Pay to have it shipped out
If you have determined that the solution to your charging port woes is to simply disassemble the port and put everything back together again, then you will need to consider shipping costs.
To expedite your delivery, you might need to consider paying for expedited shipping. This means spending more money upfront and incurring additional charges if the parcel needs to be shipped out sooner rather than later. Typically speaking, this can amount anywhere from $25-$35 – making it an incredibly worthwhile investment if it allows you to receive your package in a timely fashion!
If you elect to purchase a replacement laptop charger, it may be prudent to inquire about its price – after all, there’s no sense in spending money unnecessarily when we do not absolutely necessitate one!
4. Upgrade your ports!
If you’ve tried all of the aforementioned tips and still can’t locate your charging port, don’t despair! With a little effort, it’s quite simple to upgrade your ports.
By adding an adapter or two, you can expand your charging capabilities without sacrificing connectivity or sacrificing convenience.
Purchase an adapter with the same type of port as your original model (for example, USB-C for MacBooks), and then connect it to any nearby charging station in order to charge up. With this solution, if ever your charger fails or stops working altogether – simply swap it out for another that fits!
Thank you for reading!
Our journey with the fix is complete! Are you ready to restore your once-loose charging port? Let’s get started!
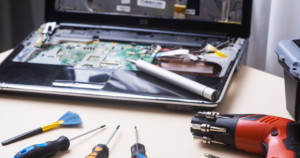
Unscrew the two retaining screws, then pull out the cable connector and rubber insert. The spring remains in place if you’d like to leave it there; however, it may be possible for you to wedge it up against one side of the port opening – just be sure that you don’t cut it free!
Conclusion
Don’t fret over a malfunctioning laptop charging port any longer! I’ve provided an easy fix, along with a bonus idea to help you keep your device charged without issues.

